Last Updated on February 12, 2019 by Heather Hart, ACSM EP, CSCS
Two of my favorite words to say are “pelican” and “proprioception”. They have absolutely nothing to do with each other, though I suppose a pelican could have amazing proprioception, as most animals do. Anyway, proprioception is your perception or awareness of the position and movement of your body in space at any given time. A pelican is a sea bird with a giant pouch under it’s beak. And at this point, I bet you’re wondering when we’re going to talk about ankle strength, stability, and balance for trail and ultra runners.
Soon, I promise.
Living here in Myrtle Beach I see a lot of pelicans. I also work, in person at the gym, with a lot of retirees/older adults. It has not been lost on me that a lot of exercises both seniors and trail runners need are similar. Both need to work on lower leg strength, hip strength, balance, and overall proprioception. Why?
So they don’t fall.
For the senior population, a fall can be absolutely devastating. Believe it or not, falls are a leading cause of death among older Americans due to complications from the fall (source). In comparison, falls for runners are not nearly as life threatening, but can be devastating in their own right. The fear of twisted and sprained ankles is the number one hesitation I hear from road runners as to why they will not venture onto the trails. For regular trail runners, a fall or misstep resulting in injury can ruin a race season.
In short: strong, stable ankles and lower legs, as well as a sufficient balance, are imperative keys to success on the trails. Here are exercises that I like to regularly incorporate into my own routine, as well as recommend for clients.
**Disclaimer: I am a certified exercise physiologist and running coach and use these exercises myself, however, these exercises are intended to be a general suggestion and not a personalized prescription. All exercises are performed at your own risk. When in doubt, check with a certified personal trainer, physical therapist, or other professional in the industry who can check your form and address and personal concerns you may have.
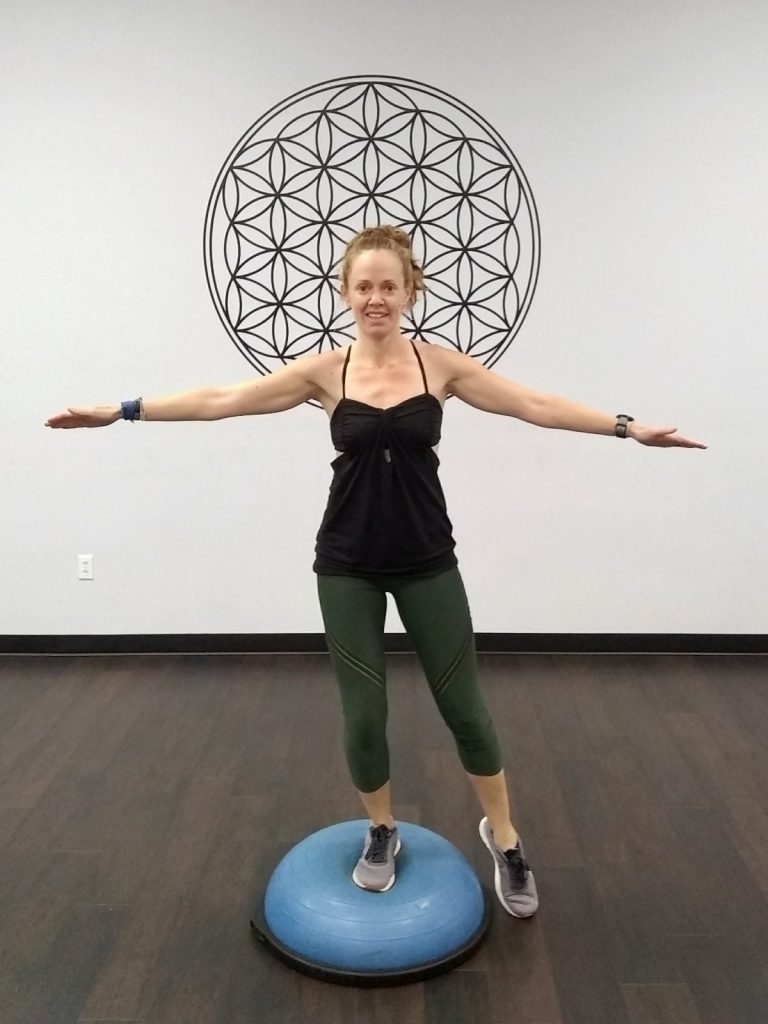
BOSU BALANCE
Please note, in many of the exercises below I use a Bosu ball. If you’ve ever wondered what that “half a yoga ball” thing in the gym is for, here are a few examples. If you don’t have a Bosu available to you, no problem. Each of these exercises can be done simply on the floor, or you can add a crumpled/balled up towel under your foot to create instability.
This exercise is very simple in execution, but depending on your lower leg strength and balance, not necessarily an “easy” exercise. The first couple of times you try this, you may find your ankles feel very wobbly: this is normal, and with practice, movement is reduced greatly.
Begin by placing one foot on the center of the Bosu ball. Then, shift all of your weight onto that supporting leg (on the Bosu).
Phase 1 is to keep the opposite toe on the floor (though weight is still in the supporting leg for balance).
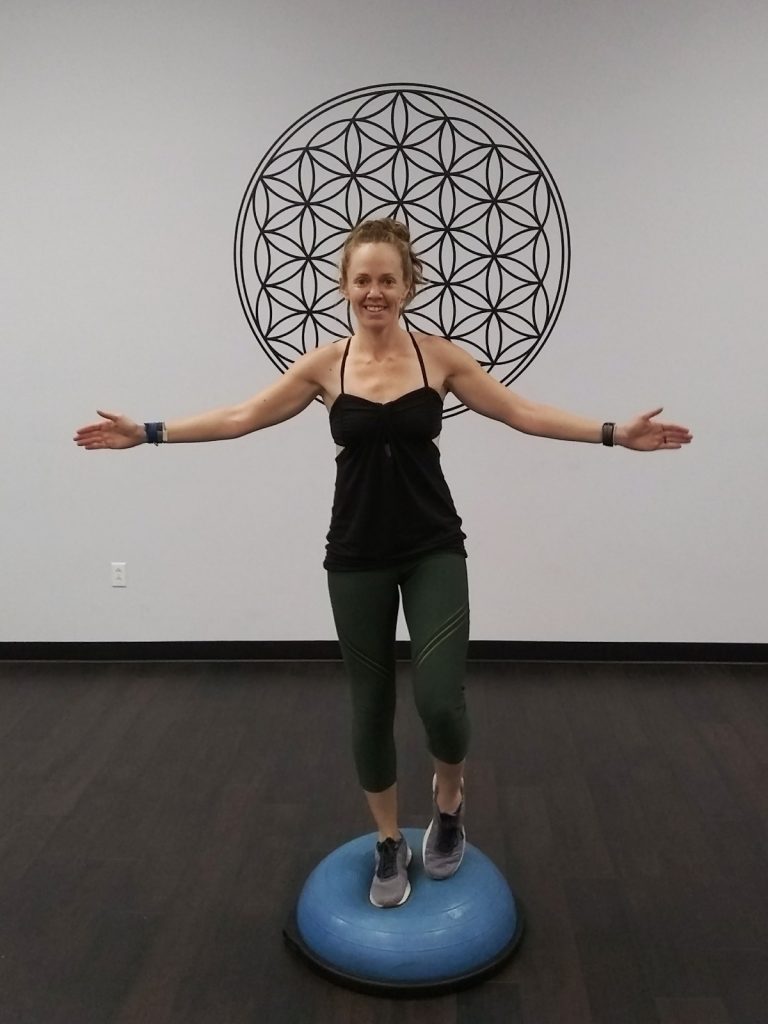
Phase two is to put both feet on the Bosu, but again, with one toe in place only for balance.
Phase three is to lift your opposite leg completely off of the Bosu.
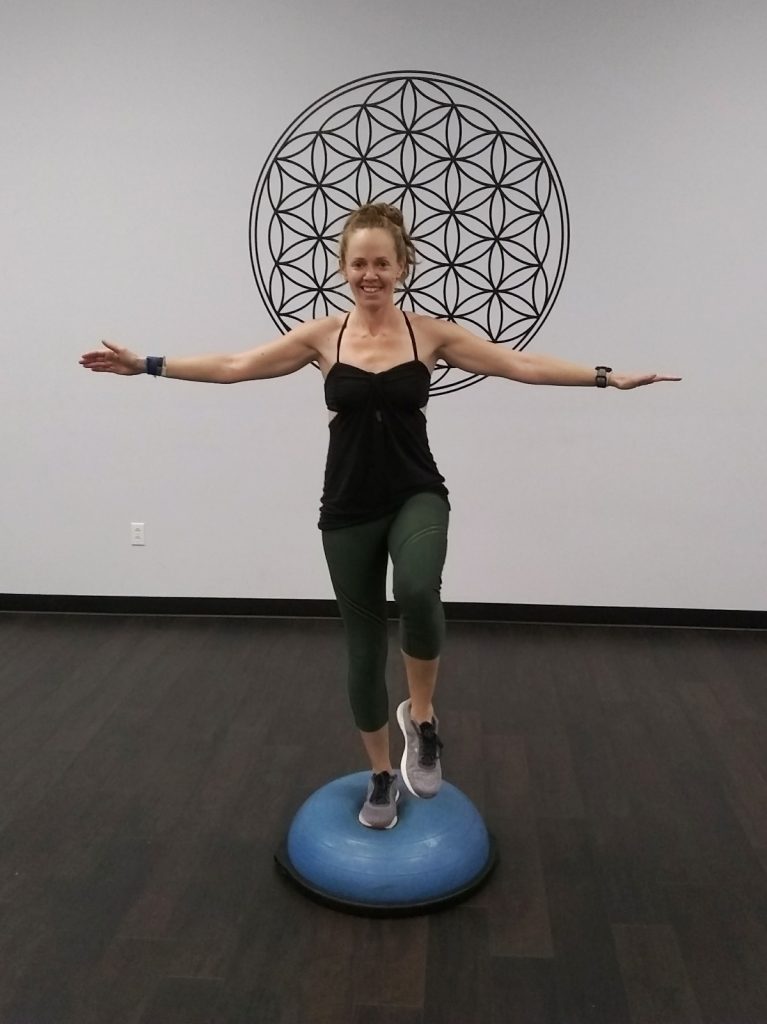
Hold each side for at least 30 seconds. Cycle through both legs, and repeat 3-4 times per leg.
SAFETY NOTE: if you have difficulty with this exercise, please start near a wall or other stable surface to help with balance.
BOSU LUNGE
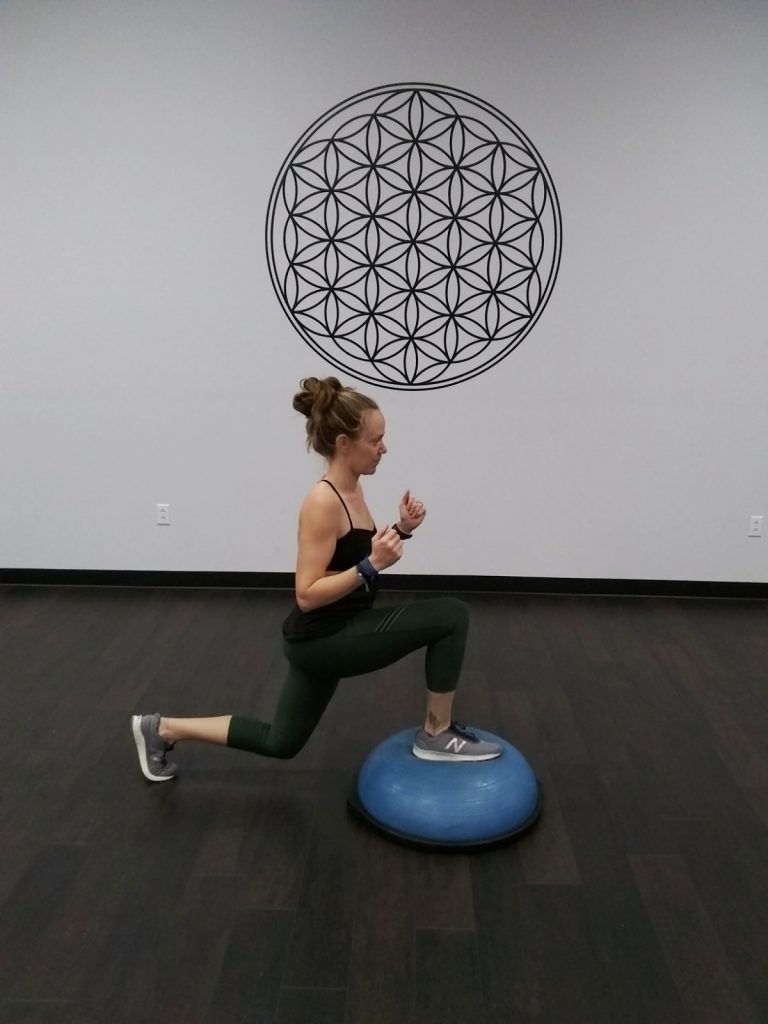
A “force you to balance” twist to a standard lunge! Start with your supporting foot on the center of the Bosu. Take a large step back with the opposite leg. Your supporting leg should be aligned so that your knee is centered above your heel, not past your toes. Torso is tall, core is tight.
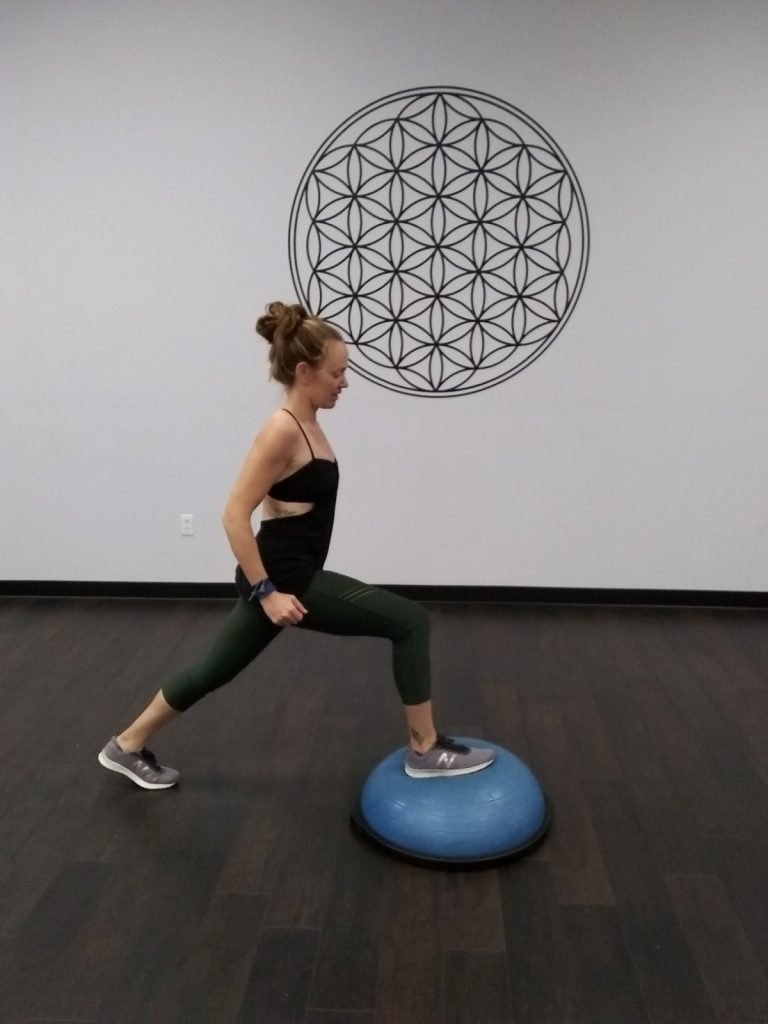
Bend your back knee and drop it towards the floor, keeping your core and torso tall and tight. When lunging, it is important to think about dropping the body down and back, rather than hinging forward at the front (supporting) knee. From here, you can either continue with your lunges, keeping the back foot on the floor, OR you can return to the start with each rep. Both will be a significant challenge to your balance! Repeat 10-15 repetitions per side, with 2-3 sets per side.
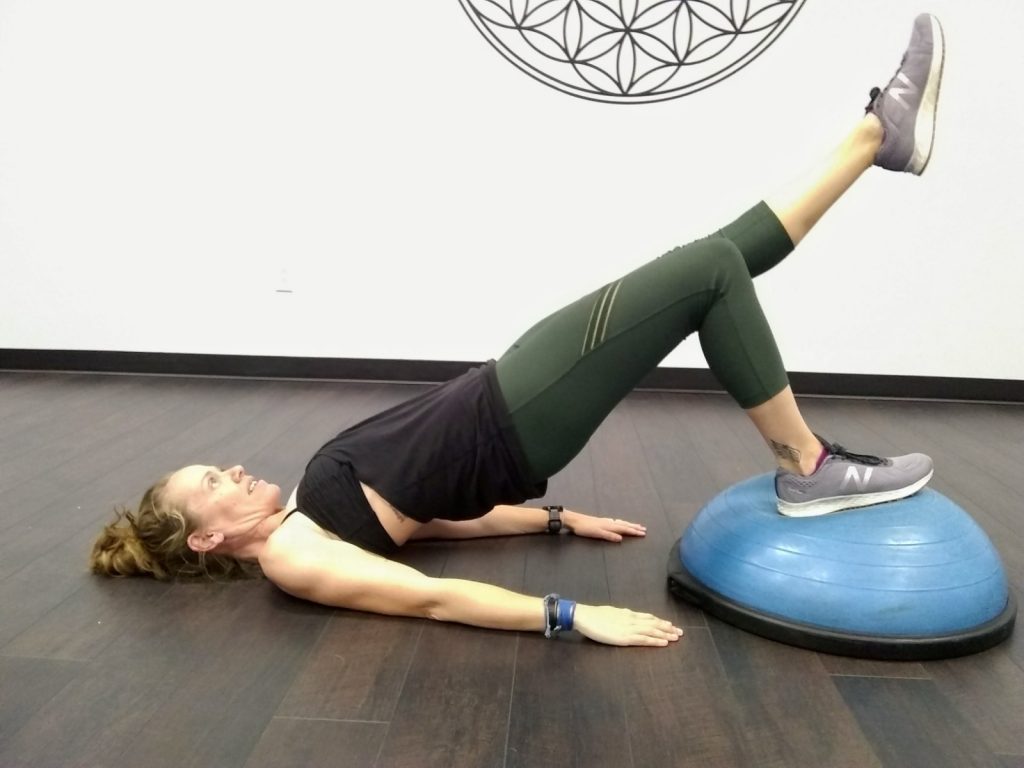
BOSU SINGLE LEG BRIDGES
Bridges are great for glute and hip strength. But turning them into single leg glute bridges adds the benefit of lower leg stability and ankle strength.
Lay down on your back. Place both feet on the center of the Bosu, and bring your butt close to the edge of the Bosu.
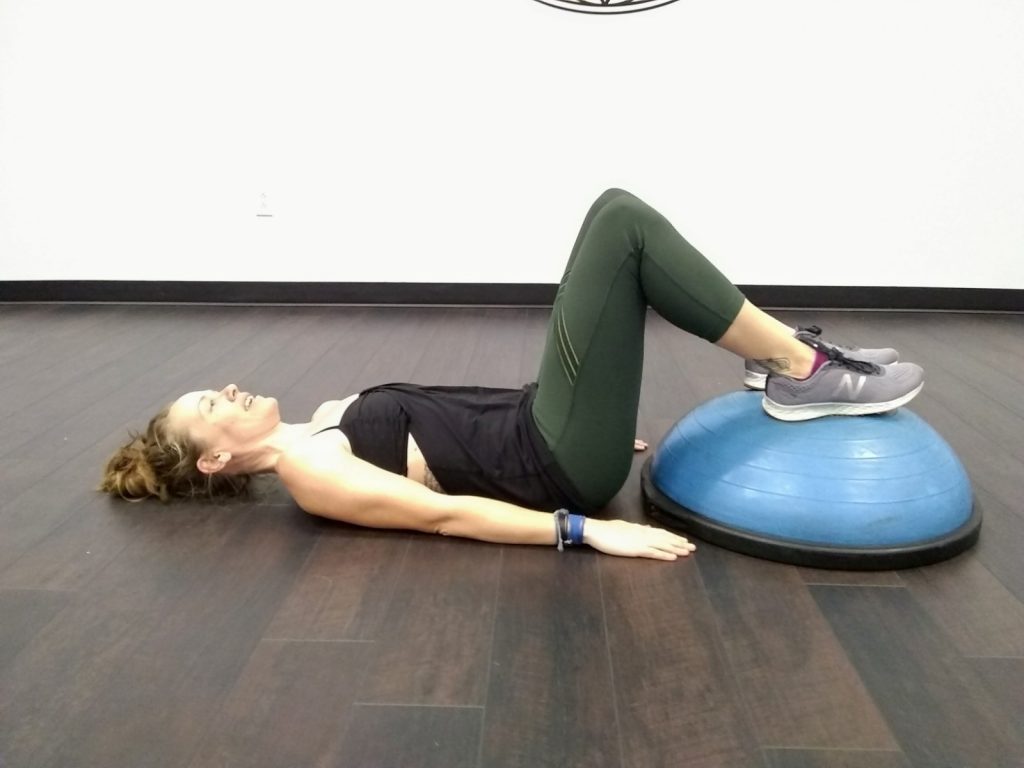
Pushing through your heels, lift your body off the ground by engaging your abdomen, glutes, and legs. Push all the way up until you are resting on your upper back. Imagine your body is in a “reverse plank”, you want your spine to be one long straight line, without hips sagging towards the ground.
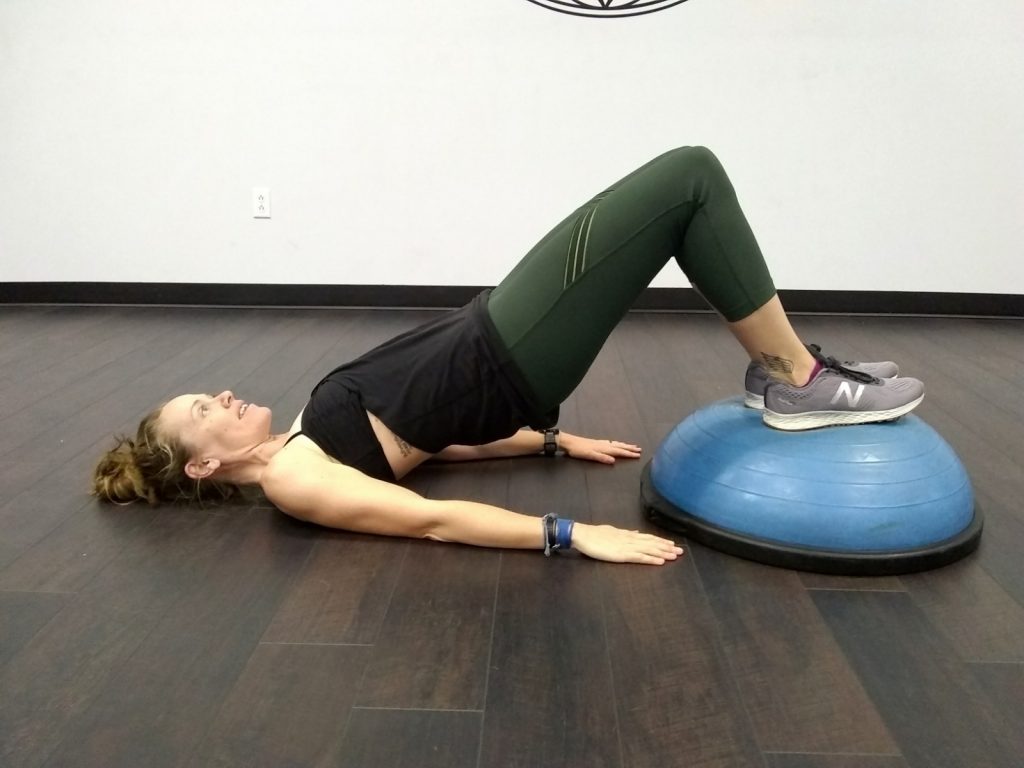
Extend one leg straight out so that your upper legs are parallel to each other. Slowly lift and lower your body off the ground, holding the top of the pose for 2-3 seconds before lowering. Really focus on keeping the hips high, while maintaining the extended leg’s position.
STEP UPS
To perform a step-up, you’re going to want some sort of a step. If you are in a gym, find yourself a plyobox, an aerobic step (like pictured below) or a sturdy bench. If you are at home, a sturdy chair or bench will work. You can even get creative and try something like a large cooler or toolbox. Whatever you use, make sure it can support your body weight.
Start with one foot on the step. Make sure your knee is aligned over your heel, and not past your toes. You are going to want to put the pressure in your heel as you step up, not your toes.
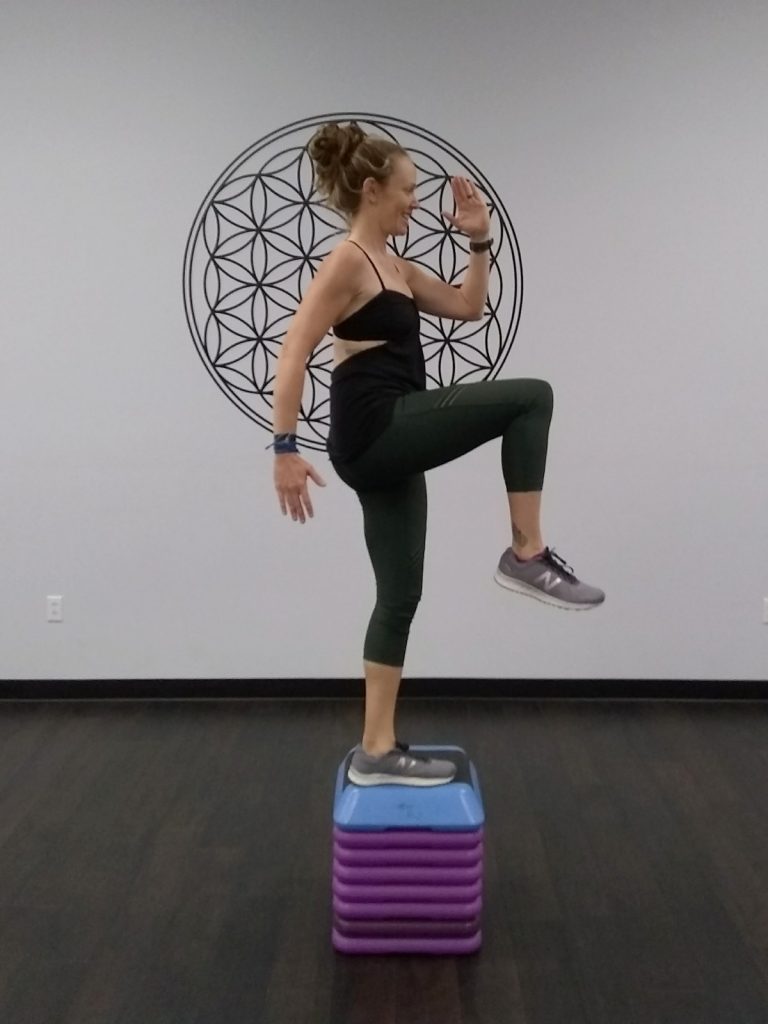
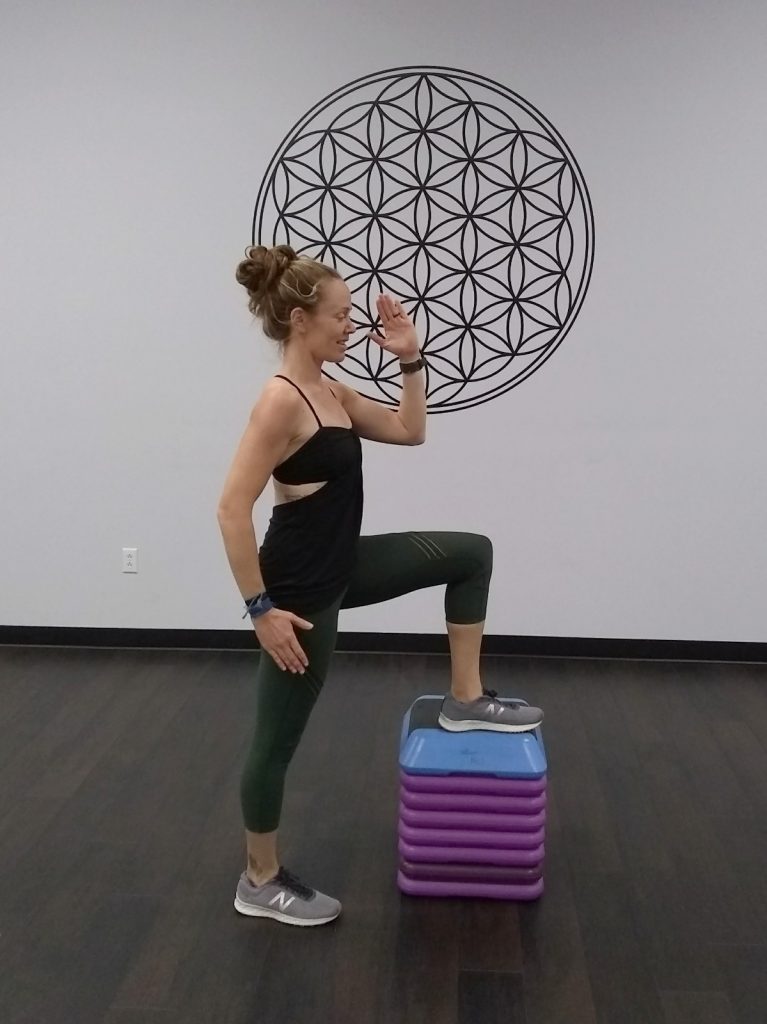 Pushing through the heel and the mid foot, step straight up onto the step. Continue the movement, driving your opposite knee in the air, supporting yourself on one leg. Hold your balance at the top of the step for 2-3 seconds before returning to the ground. Repeat 10-15 times before switching legs, 2-3 sets per leg.
BALANCE WORK WITH GLIDERS
I absolutely love these little gliders discs, often found in gyms. If you don’t have any available to you, have no fear! Paper plates (yes, paper plates) or a small face towel will work just as well on a smooth surface, like a linoleum or hardwood floor.
To start, place the supporting foot on the floor, without a disc under it. Place a disc under the opposite foot. Crouch down into a squat position. In one smooth movement, bring the glider/disc foot straight forward, then to the side, then behind you. Repeat for five reps, then switch directions.
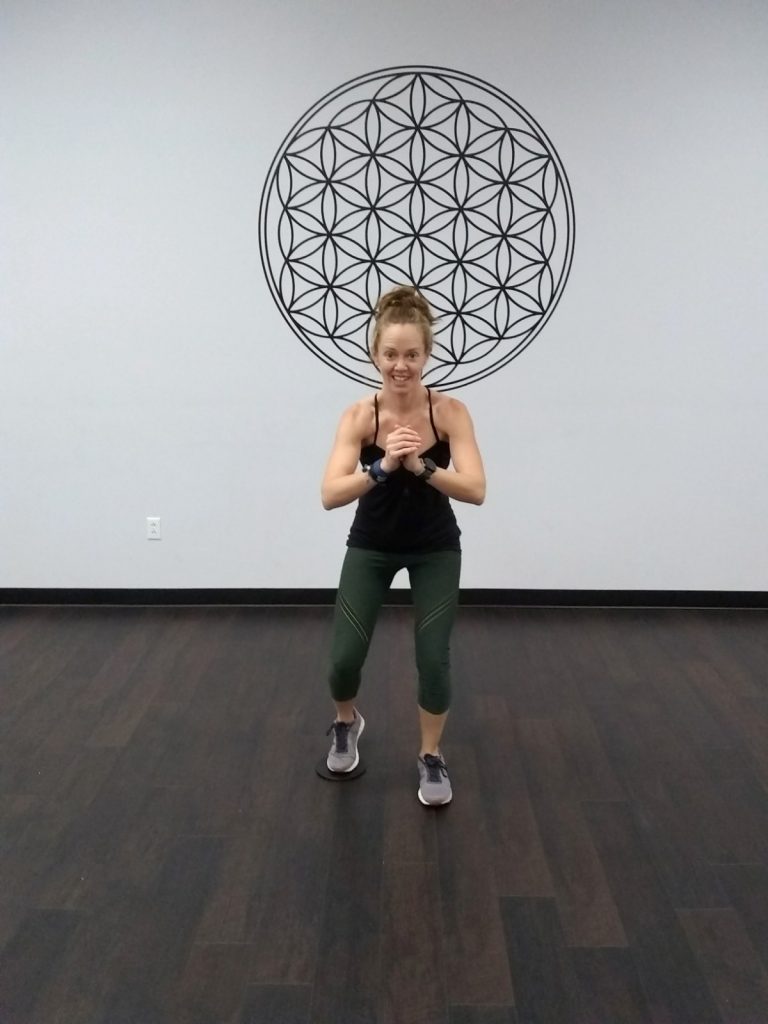
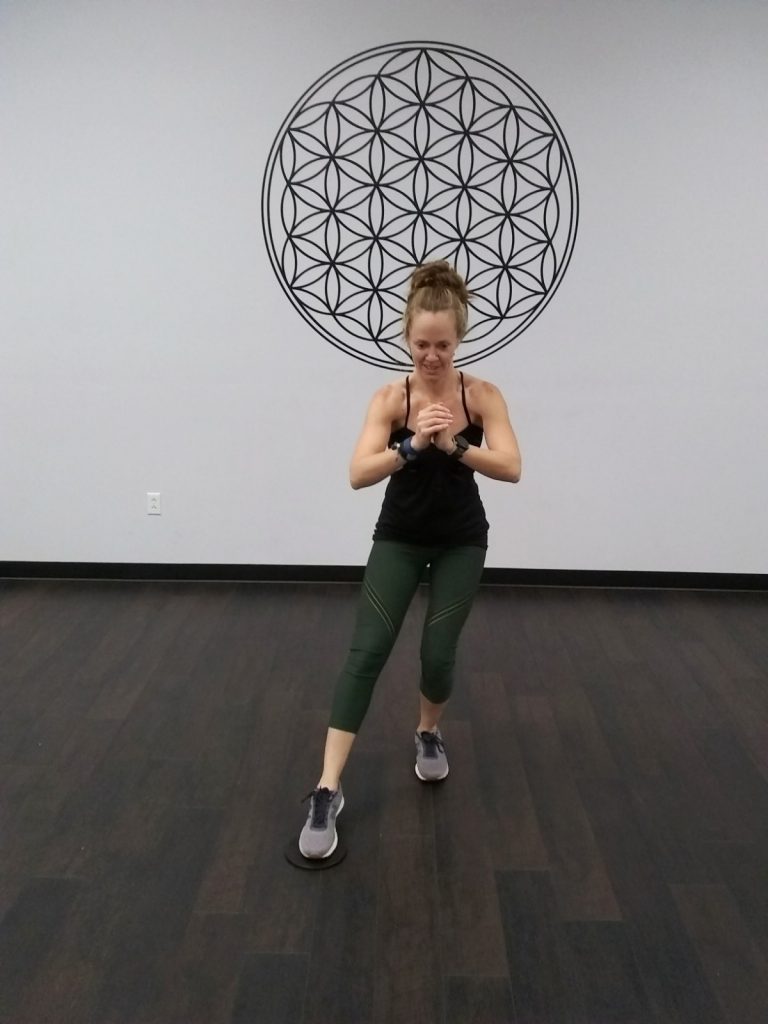
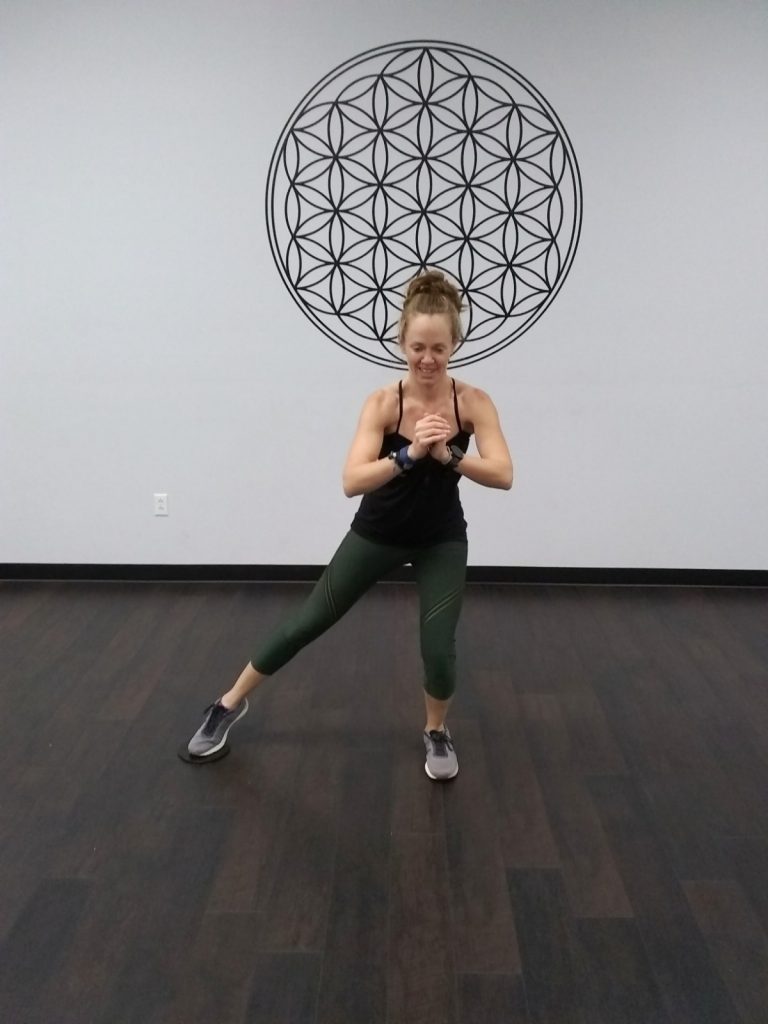
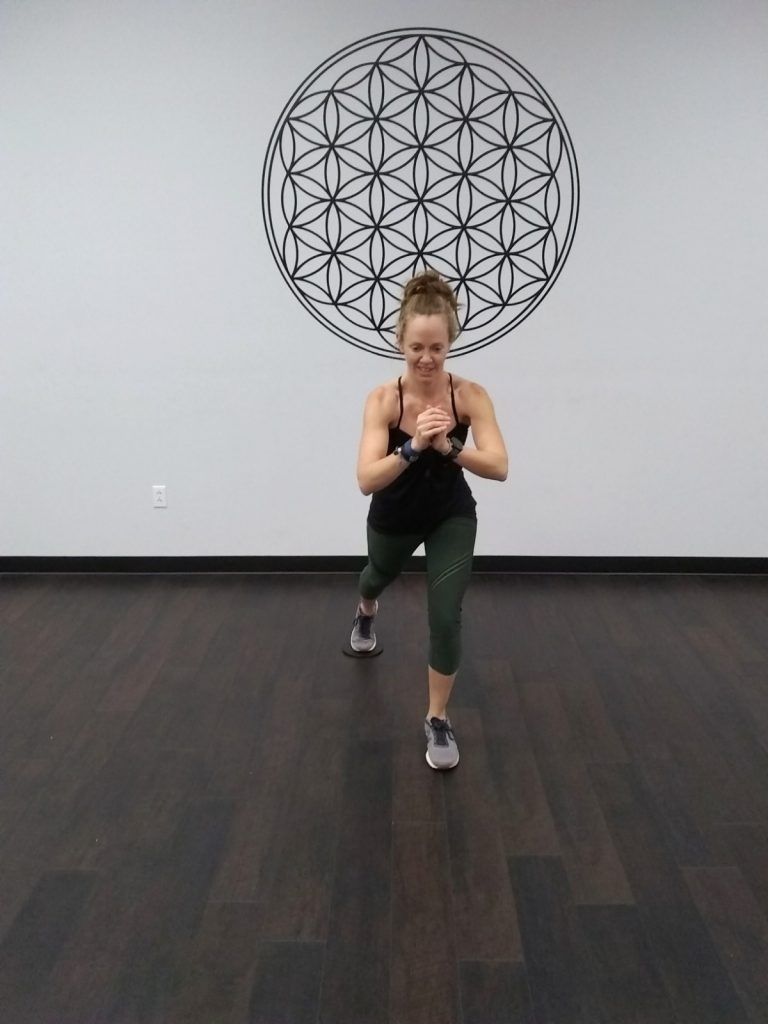
Because a video makes much more sense for this exercise, ta-da!
View this post on Instagram
SINGLE LEG DEADLIFT WITH KNEE RAISE
A great balance-forcing twist to a standard hamstring, glute, and low back exercise: the deadlift.
Begin with a weight in one hand, such as a dumbbell, kettlebell, or plate (as pictured below). Hold the weight on the same side as your supporting leg. Bring your opposite knee up past your hip, balancing on your supporting leg.
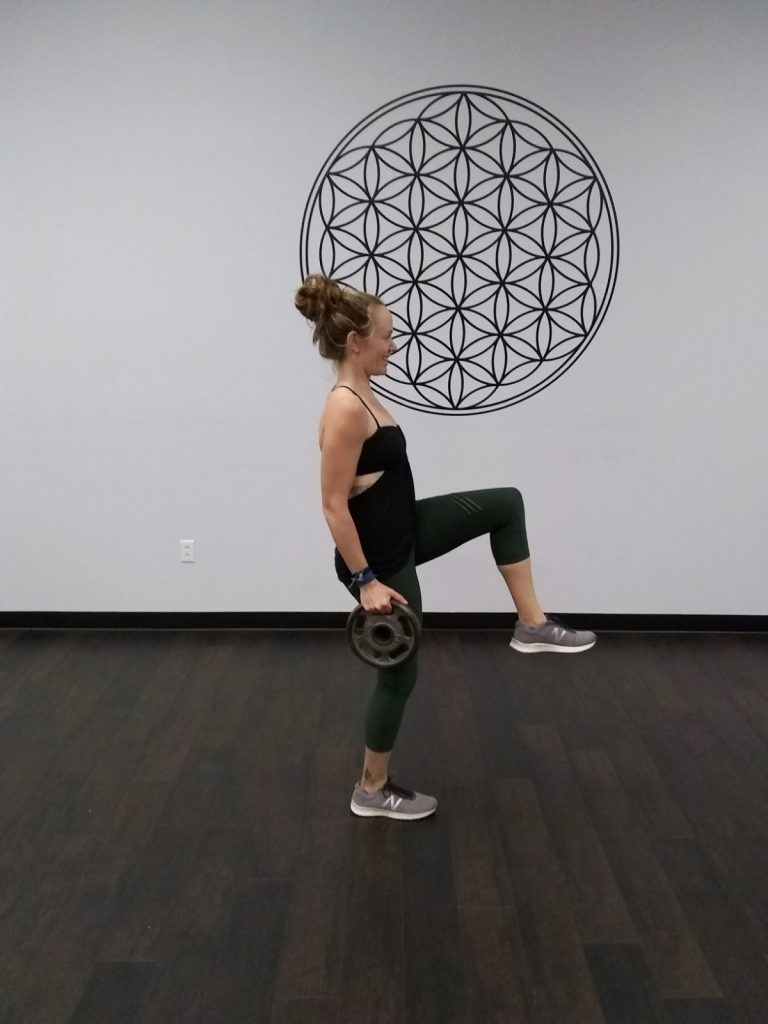 In one smooth movement, bring your knee back down, hinge forward at the hips (keeping your core engaged and back FLAT) and extend your free leg out behind you, almost like a lever. Use your weighted arm to help provide counter balance. Push back up through the heels, return to standing, and drive your knee back up
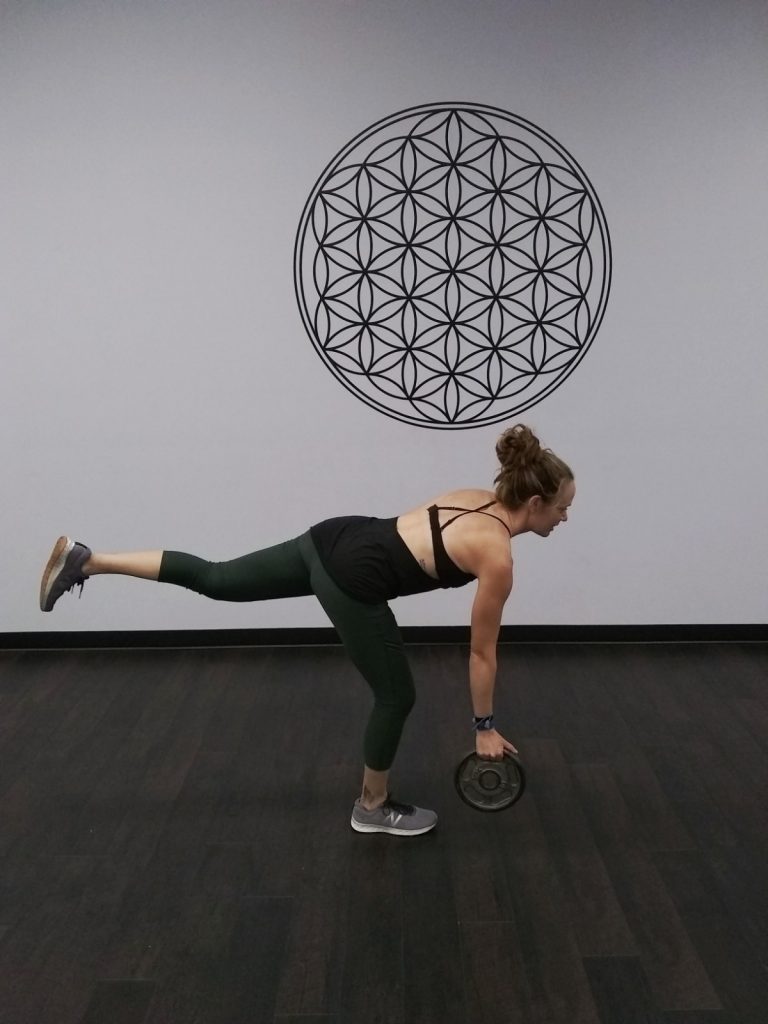
Here is a video demonstrating the single leg deadlifts, without the knee raise.
View this post on Instagram
SUPPORTED PISTOL SQUATS
Listen: I can’t do a true pistol squat. I don’t know if it’s a lack of hamstring mobility, strength, core, balance, or all of the above, but I can’t do one (though to give myself credit, I don’t practice either.)
But I CAN do a supported pistol squat (and you can too!) using a TRX or rings!
To perform a pistol (or single leg) squat, hang on to a TRX, a set of rings, or even a post/pole of a rig or cable crossover. Essentially, anything stable and sturdy that can support your body weight. Extend one leg out in front of you at about a 45 degree angle. With your supporting leg: squat down.
When you return to standing, try to push your weight through your supporting leg, rather than pulling yourself up with the TRX/rings/etc. Use those only for balance.
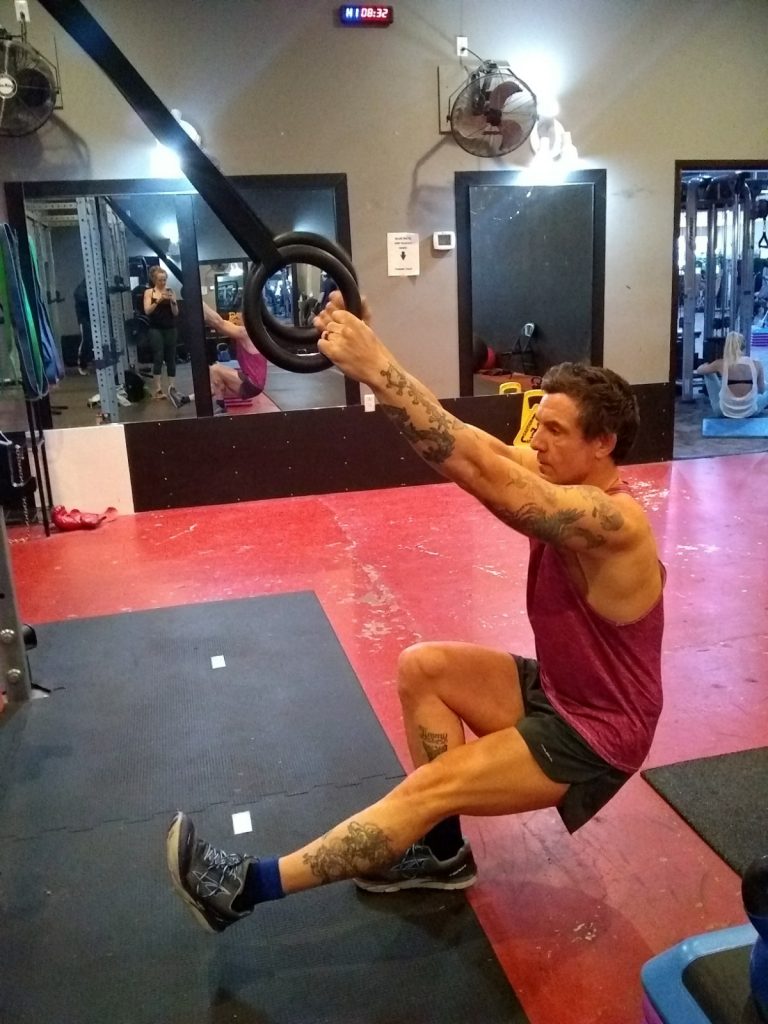
As you may have noticed, the common denominator in all of these exercises is focusing on using one leg at a time. As such, you can absolutely modify many exercises to help with lower leg and ankle strength, by doing them on one leg.
Oh, and you know what else is great for strengthening lower legs and ankles, while challenging your balance and proprioception?
TRAIL RUNNING!
So head to the trails, and run them often. Trust me, it’s good for you.

Heather Hart is an ACSM certified Exercise Physiologist, NSCA Certified Strength and Conditioning Specialist (CSCS), UESCA certified Ultrarunning Coach, RRCA certified Running Coach, co-founder of Hart Strength and Endurance Coaching, and creator of this site, Relentless Forward Commotion. She is a mom of two teen boys, and has been running and racing distances of 5K to 100+ miles for over a decade. Heather has been writing and encouraging others to find a love for fitness and movement since 2009.
Nicole @ Fitful Focus
Single leg deadlifts are in my workout plan for today. I really need to get myself a bosu ball!
GiGi Eats Celebrities
THIS is PERFECT for me because who knows when I am going to be able to get back to the GYM since having a new baby. I have a “gym” in my house – so I can do ALL of these work outs!! NO EXCUSES 🙂
Deborah Brooks
I love using my Bosu for balance exercises. Many of these are in my strength training routine
Abbey Sharp
These are some great exercises! Thanks for the awesome visuals
Sarah
I’m guilty of not doing enough lower body work! I’d rather do upper body, but these exercises sound great.
Kelly Page, Health Coach, CTNC (@TastingPage)
I always forget about the bosu ball. Those are some great exercises!
Julie @ Running in a Skirt
These are great! I have a bosu ball currently collecting dust that I need to use again.
Shannon
This traiiing plan and exercises was SO helpful! Thank you!!!